turkey lettuce wraps

Made with ground turkey but you could make it with ground chicken or beef instead

Just when we thought that it was starting to heat up in Texas, we get a cold snap! Winds were high and temps were in the low 30’s! This Texas girl can’t take it!

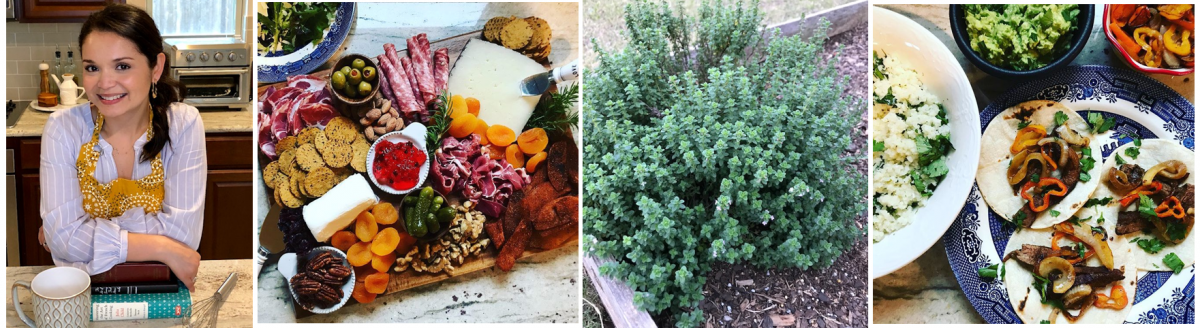
But beyond the chill in the air, we have started to see sprouts popping up in our backyard garden. One of our earliest harvests has been our Boston Bibb lettuce.

My green thumb holding our first harvest of Boston Bibb lettuce

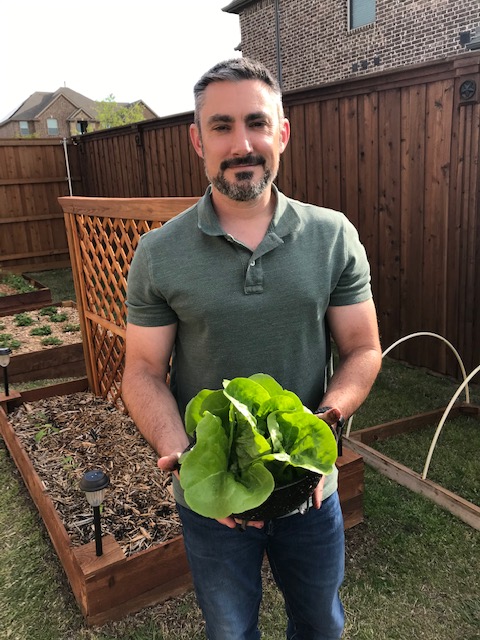
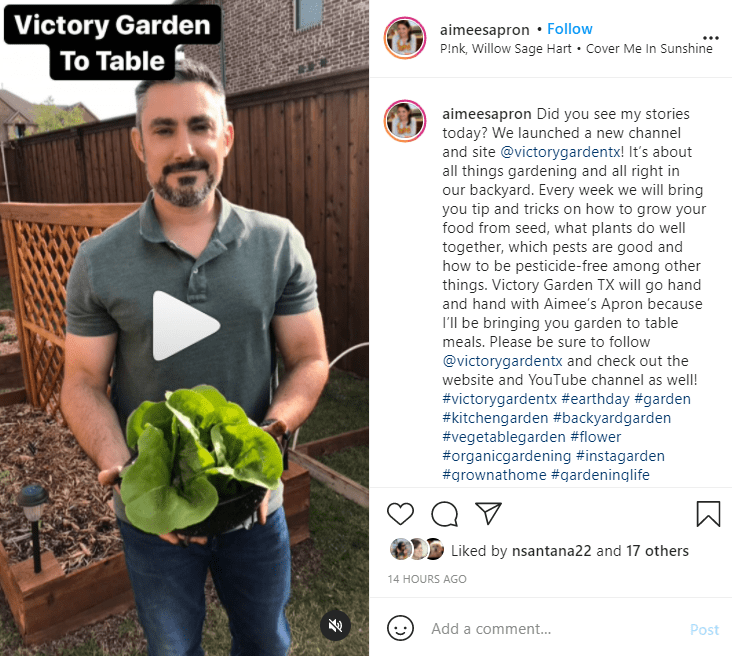
So now would be a good time to let you guys know that we have just launched a new site: victorygardentx.com. This is where we will share with you our backyard garden and talk tips and tricks for growing fruits, vegetables and herbs right in your own backyard!

We will be updating the website weekly with new videos on topics such as what we are growing, how to grow pesticide-free and how to maximize your garden for minimal waste. What’s even better is that once we harvest at Victory Garden, we can cook and eat at Aimee’s Apron.

Please be sure to follow our new channel on Instagram @victorygardentx https://www.instagram.com/victorygardentx/

And visit the new website: http://www.victorygardentx.com

And don’t forget our YouTube Channel: https://www.youtube.com/channel/UC2D1A7ULHnHht_xsxzJVPGg

And now onto the recipe!

turkey lettuce wraps

makes 4 servings

  • 1 lb. ground turkey
  • 1 tsp. olive oil
  • 1 garlic clove, minced
  • 1 tbsp. ginger, minced – can also substitute with 1 1/2 tsp. ground ginger
  • 8 oz. can of sliced water chestnuts, drained & chopped
  • 1/3 cup of sliced green onions
  • 4 tbsp. hoisin sauce
  • 2 tbsp. rice wine vinegar
  • 1 tsp. honey
  • 1 tsp. sesame oil
  • 2 tbsp. soy sauce
  • Salt & pepper to taste
  • 1 head of bibb or butter lettuce – can substitute with iceberg
  1. In a large skillet, heat the olive oil and add the ground turkey, seasoning with salt and pepper. Cook until browned.
  2. Add the water chestnuts and the whites of the green onion to the pan and sauté.
  3. In a mixing bowl, combine the hoisin, vinegar, honey, sesame oil, soy sauce, garlic and ginger. Add this mixture to the pan and cook until meat is coated and sauce has thickened.
  4. Cool slightly and sprinkle remaining green onions on top.
  5. Serve inside lettuce cups.

https://www.instagram.com/reel/CN_Ml-gh9MX/

Please follow me @aimeesapron on Instagram for more recipe ideas daily! https://www.instagram.com/aimeesapron/

chicken, broccoli & rice dinner

I live in Texas and we have been voluntarily sheltered-in-place since March 8th! This time at home has got me cranking out three meals a day and I am also wanting to be conscious to stretch these meals and much as I can seeing as meat proteins are becoming hard to come by. But with a family of 5, all with healthy appetites, I sometimes have to get creative.

I also need to be able to make these meals in a hurry because we all seem to need food ASAP. This meal comes together very quickly and is also a great way to get my 3 kiddos to eat their veggies. Here’s how I made it.

chicken, broccoli and rice dinner

makes 5 servings

  • 1 lb boneless and skinless chicken breasts, cubed
  • 1 cup rice, any kind will do
  • 1 1/2 cups fresh broccoli, I had to use up a large bag before it went bad, but you can use more or less
  • 1/2 cup shredded cheese
  • 1/2 cup chicken broth
  • salt and pepper to taste
  • 2 teaspoon oil
  • 1/4 cup water
  • optional: diced green onion
  1. In a small pot, cook up your rice and set aside. You can also use already cooked rice in the pouch. Just heat up per directions.
  2. In a large pan, one with a lid, add 1 teaspoon of oil and chicken. Season with salt and pepper and cook until golden brown. Remove chicken and set aside.
  3. In the same pan you cooked the chicken in, add the other teaspoon of oil and your broccoli. Season with salt and pepper and add 1/4 cup of water. Top with the lid, and allow it to steam for 5 minutes over medium heat.
  4. Next add the rice and chicken back into the pan and stir together.
  5. Drizzle the chicken broth over and stir to combine.
  6. Lastly, sprinkle the cheese liberally over the entire dish and top with the lid to melt the cheese for just a few minutes.

Please follow me @aimeesapron on Instagram for more recipe ideas daily! https://www.instagram.com/aimeesapron/

lazy beef and cheese enchiladas

I love Tex-Mex, heck, I’m born and raised Texan, so I would eat this style of food every day if I could! I’ve made the traditional enchiladas with rolled corn tortillas filled with chicken, beef and sometimes just cheese; but enchiladas can be tedious and when we are really hungry we need short cuts.

I’ve turned the process of rolled enchiladas into a lasagna-type casserole and it doesn’t skimp on flavor. Tonight, I’ll tell you how to make this cheesy-beefy version.

lazy beef and cheese enchiladas

makes 5 – 7 servings

  • 1 pound ground beef, I like 85/15
  • 1 teaspoon oil, we use avocado but you can use vegetable
  • 18 corn tortillas
  • 1/2 a small onion, diced
  • 1 teaspoon crush garlic
  • 1 small can of diced green chiles
  • 2 cups shredded cheese of our choice
  • 1 large can of red enchilada sauce, I didn’t have any so I made my own – recipe below
  • optional fixins: sour cream, cilantro and pickles jalapenos
  1. Preheat your oven to 375 degrees.
  2. Lightly grease a 9 x 13 casserole dish and set aside.
  3. In a medium pan, cook and brown your beef and onion in a teaspoon of oil.
  4. Add the crushed garlic and green chiles and mix until beef is cooked through.
  5. If your beef mixture is watery, drain the fat. Mine was not and I used a slotted spoon when adding to the casserole.
  6. Open your can of red enchilada sauce and heat over a small pot until simmering. If you don’t have store-bought enchilada sauce, you can make your own with ingredients you probably already have. Recipe below.
  7. Now you can start layering your enchilada bake. Start by adding about 1/4 cup of red sauce to the bottom on your casserole dish, spread evenly.
  8. Next, carefully dip a corn tortilla in the red sauce, making sure to coat the front and back and then lay at the bottom of the casserole dish. Repeat this step 6 times to cover the bottom.
  9. Next, add half of your beef mixture on top of the tortillas, spreading evenly.
  10. Next sprinkle 1/3 of your shredded cheese on top. That’s the first layer!
  11. Repeat this process one more time.
  12. Next, dip 6 more corn tortillas into the red sauce to top your casserole.
  13. Pour the remaining red sauce evenly over the entire casserole.
  14. Sprinkle your remaining cheese on top and cover with foil.
  15. Place in the oven for 30 minutes.
  16. Once the 30 minutes is up, remove the foil and add pickled jalapenos to the top and place back in the oven for 3 – 5 more minutes.
  17. Last, slice up and serve with cilantro and sour cream!

Please follow me @aimeesapron on Instagram for more recipe ideas daily! https://www.instagram.com/aimeesapron/

chicken chili

It’s Sunday night and apparently Oscar night as well. I’m not one who needs an excuse to cook a meal that gathers you around the TV, but it just so happens that this chicken chili I created on the spot, would be PERFECT to eat on the couch. Let me tell you how I made it!

chicken chili

makes 4-6 servings

  • 2 large boneless and skinless chicken breasts
  • 1/4 cup of water
  • 1 teaspoon olive oil
  • Salt & pepper
  • 1/2 a red onion, diced
  • 1 tablespoon chili powder
  • 1 teaspoon cumin powder
  • 1/2 teaspoon granulated garlic powder
  • 1 15 oz. can of diced tomatoes
  • 1 15 oz. can of red kidney beans
  • 1 small can of green chilies
  • Juice of one lime
  • Toppings: optional
  • Shredded cheese
  • Sour cream
  • Guacamole or avocado
  • Pickled jalapenos
  • Corn chips
  • Drizzle olive oil into pot and set over medium-high heat.
  • Season the chicken breasts with salt, pepper and a pinch of garlic powder.
  • Place chicken seasoned-side down into the pot and allow to sear on one side for about 7 minutes. Season the other side.
  • Flip the chicken and cook on the other side about 5 minutes or until cooked through. Remove chicken onto cutting board.
  • Add the water to the pot and deglaze. Add the diced onions and sauté.
  • To the pot add the tomatoes, kidney beans and green chilies. Stir.
  • Next, also add the seasonings: chili powder, cumin and remaining garlic powder. Stir to combine.
  • Add the chicken back to the pot and simmer on low for about 5 minutes.
  • Serve with your favorite toppings!

Please follow me @aimeesapron on Instagram for more recipe ideas daily! https://www.instagram.com/aimeesapron/

m&m cookies (no chill)

m&m cookiescourtesy of ihearteating.com

makes about 20-25 cookies

  • 1/2 cup butter
  • 1/2 granulated sugar
  • 1/4 cup packed brown sugar
  • 1 tablespoon vanilla
  • 1 large egg
  • 1 3/4 cups all purpose flour
  • 1/2 teaspoon baking soda
  • 1/2 teaspoon kosher salt
  • 1 cup mini M&M’s *
  1. Preheat the oven to 350 F.
  2. Microwave the butter for about 30 seconds. Butter should be completely melted but shouldn’t be hot.
  3. In a large bowl, mix butter with the sugars until well-combined.
  4. Stir in vanilla and egg until incorporated.
  5. Add the flour, baking soda, and salt. Mix until just combined. Dough should be soft and a little sticky but not overly sticky.
  6. Stir in M&M’s.
  7. Using a small cookie scoop, scoop out dough and place on baking sheet.*
  8. Bake for 10-15 minutes.*

*Small alterations I made to the recipe

Please follow me @aimeesapron on Instagram for more recipe ideas daily! https://www.instagram.com/aimeesapron/

peanut butter thumbprint cookies

I’ve said it time and time again, I do not love to bake. Every now and then I do get the itch, but those days are few and far between. I tell my friends and family, “I am a cook.” I like to be a tornado in the kitchen adding a little this and a little that, and baking is so precise…you have to measure everything carefully. But alas, it is Christmas time and my girls wanted to make these cookies for Santa. And so here we are. I’m sitting in my dark an quiet office recovering from the whole ordeal. These cookies however, are pretty simple to make.

peanut butter thumbprint cookiescourtesy of Betty Crocker recipes

makes 25 cookies

  • 1/2 cup of granulated sugar
  • 1/2 cup packed brown sugar
  • 1/2 cup creamy peanut butter
  • 1/2 cup butter, softened
  • 1 egg
  • 1 1/2 cups all purpose flour
  • 3/4 teaspoon baking soda
  • 1/2 teaspoon baking powder
  • Additional granulated sugar
  • About 25 Hershey’s kisses
  1. Heat oven to 375°F. In large bowl, beat 1/2 cup granulated sugar, the brown sugar, peanut butter, butter and egg with electric mixer on medium speed, or mix with spoon, until well blended. Stir in flour, baking soda and baking powder until dough forms.
  2. Use a small cookie scoop to make balls; roll in additional granulated sugar. On ungreased cookie sheets, place about 2 inches apart.
  3. Bake 8 to 10 minutes or until edges are light golden brown. Immediately press 1 milk chocolate candy in center of each cookie. Remove from cookie sheets to cooling rack.

Please follow me @aimeesapron on Instagram for more recipe ideas daily! https://www.instagram.com/aimeesapron/

tea for two

What little girl doesn’t loves her tea parties? I grew up having tea parties with my dolls, dog and sometimes my sister. I have to confess that I didn’t think I really felt like a grown-up until I had my own tea set.

Now, my tea setup doesn’t follow any set of rules. Afternoon tea is designed around three key themes: 1. good tea & food, 2. beauty 3. ease.

I invite you to check out how @aimeesapron does tea according to me.

good tea & food

You must supply a variety of teas – in a satchel and loose leaf. I love a good tea box that presents the tea beautifully to your guests.

The food is simple, but themed. At least two breads are necessary and at least three varieties of sandwiches. I chose pumpernickel and a gluten free oat bread. The sandwiches were cream cheese and cucumber, smoke salmon canapes and egg salad. Check out the recipes for each below. You must also cut the crusts off the bread and cut them into thick matchsticks, 1-2 inch squares or you can use a biscuit cutter like I did for the round canapes.

beauty

The beauty comes from the chine. Be it new, like mine, or handed-down, the tradition of tea itself is beauty. You don’t have to drop a lot of cash to get a good china set. You can peruse the aisles at your local antique store and find a steal – or even mismatched tea cups and saucers sound like a fairy-tale.

ease

Now I feel that this might be the most important element to a great tea. Easy does it. If you make it overwhelming, you find yourself reaching for teat anytime soon. Make the sandwiches ahead. They keep very well and cut even better this way. Get help from the store. For a sweet note, I added store bough Madeline’s which would frankly be too stressful for me to make. Afternoon tea was meant to be a time to relax, reflect and share. So take it easy.

cucumber sandwiches

  • 1 English cucumber (they don’t have many seeds and are not as watery)
  • Softened cream cheese
  • Bread of your choice
  1. Slice the cucumber as thinly and uniformly as you can.
  2. Spread and even layer of cream cheese on both bread slices.
  3. Lay the cucumber slices on the bread, covering the bread as much as you can. Cut the cucumber into shape as needed.
  4. Put the bread slices together. Cut the crusts off and cut into the shape of your choice.

smoke salmon canapes

  • 1 package of smoke salmon
  • An English cucumber
  • Softened cream cheese
  • Fresh dill
  • Bread of your choice
  1. Use a round biscuit cutter, cookie cutter or even a cup to cut round pieces out of your bread.
  2. Spread the cream cheese over each bread slice.
  3. Thinly slice the cucumber and lay a slice or two on top of the bread.
  4. Lay a few slices of smoke salmon on top of the cucumber.
  5. Place a small dollop of cream cheese on top of the salmon and add a sprig of fresh dill.

egg salad sandwich

  1. 2 hard-boiled eggs
  2. 1 tablespoon of mayonnaise
  3. Pinch of salt & pepper
  4. 2 stalks of celery, finely diced
  1. Finely dice the hard-boiled eggs and add to a small bowl.
  2. Add the celery, mayo, salt & pepper and stir to combine.
  3. Add a generous helping to one slice of bread and then lay the other slice on the bread to make the sandwich.
  4. Cut the crusts off the bread and cut into whatever shape you prefer.

Please follow me @aimeesapron on Instagram for more recipe ideas daily! https://www.instagram.com/aimeesapron/

chicken pot pie

Oh what a manic-Monday! These days, although very busy, go so quickly for me. I will suddenly look up and realize that I only have about 45 minutes to get dinner ready before night fall and then the evening really speeds up.

Tonight, I remembered that I had two pie crusts in the freezer, some already cooked chicken and knew that meant I needed to make a chicken pot pie!

You can watch my crazy shenanigans as I get dinner ready in my Instagram highlights here: https://www.instagram.com/stories/highlights/17853114631614889/

chicken pot pie

makes 5-6 servings

  • 2 frozen pie crusts
  • 1 cup already cooked chicken breast, shredded
  • 1 cup diced carrots
  • 1 tablespoon of garlic, crushed
  • 1 small onion, diced
  • 1 cup frozen peas
  • 1-2 sprigs of fresh thyme
  • 1 tablespoon of oil
  • 1 tablespoon of butter
  • 2 tablespoons of flour, I used gluten free
  • 1 cup of chicken broth
  • Optional: a drizzle of heavy cream
  1. Preheat your oven to 350 degrees.
  2. Place one pie crust in a glass pie dish. Pierce the bottom with a fork to prevent it from bubbling. Par-bake according to the package instructions. Remove and set aside.
  3. In a medium pot, add 1 tablespoon of oil and butter.
  4. Add the carrots, onions and garlic and saute until tender.
  5. Add a good pinch of salt and fresh thyme, stir and then add the chicken.
  6. Once the veggies are tender, add the flour and stir around letting the flour to cook for a minute or so.
  7. Next, add the broth stirring until the mixture combines and becomes bubbly. Add the frozen peas and allow them to thaw.
  8. Lastly, drizzle in the heavy cream and stir to combine. Take off the heat.
  9. Grab the pie dish and place filling inside.
  10. Use the egg wash to brush the rim on the pie dish.
  11. Lay the other pie crust over and crimp the edges.
  12. Cut four slits and a hole in the middle to let the pie breath while baking.
  13. Bake at 350 degrees for about 15 – 20 minutes or until the top crust is golden brown.

Please follow me @aimeesapron on Instagram for more recipe ideas daily! https://www.instagram.com/aimeesapron/

gluten free lasagna

Now that we’ve reached our first day with 40 degree weather here in Texas, I’m ready to get my baking on. It was a chilly and rainy day here to start and by the time I finished breakfast, I knew what I was going to make for dinner.

Now lasagna is like chili. Everyone has their own recipe and there are so many great variations. If you’ve gotten to know me by now, you know that I cook with a “little of this, and a little of that” attitude. The kitchen is my testing ground and I’m happy to say that although I started with a pile of ingredients, I took notes of my portions and came up with a pretty tasty result. My version is gluten free – but you can follow the same steps with gluten-full.

You can check out how I made it on my Instagram highlights here: https://www.instagram.com/stories/highlights/17918160637345176/

gluten free lasagna

makes 8-10 servings

  • 1 pound of 85/15 ground beef
  • 1 package of gluten free lasagna sheets, ready for the oven – I used Barilla brand
  • Salt to taste
  • 2 teaspoons of Italian seasoning
  • 1 tablespoon of garlic, crushed
  • 1/2 an onion diced
  • 1 teaspoon olive oil
  • 1 tub of 15 oz. ricotta cheese
  • 2 eggs, scrambled
  • 2 cups of shredded mozzarella cheese
  • 1/4 cup shredded Parmesan cheese
  • 2 cups fresh spinach
  • 2 jars of marinara sauce
  1. Put a pan on medium-high heat and add 1 teaspoon of olive oil.
  2. Add the ground beef, a pinch of salt, 1 teaspoon of Italian seasoning and the garlic to the pan. Break up the beef and brown. Once cooked, set aside.
  3. In a small bowl, combine the eggs, ricotta cheese and other teaspoon of Italian seasoning. Mix until smooth. Set aside.
  4. Pre-heat your oven to 425 degrees.
  5. Pour about 1 cup of marinara sauce in the bottom of your 9×13 baking dish and spread evenly.
  6. Next, lay 4 sheets of pasta and spoon over more marinara sauce. Spread to cover the pasta completely.
  7. Dollop the ricotta cheese over the sheets, using the back of the spoon to spread evenly.
  8. Sprinkle fresh spinach leaves on top, then add a few spoonfuls of the beef mixture on top of that.
  9. Sprinkle mozzarella cheese over. Repeat 3 more times ending with just the marinara sauce, ricotta cheese, remaining mozzarella cheese and then the Parmesan cheese.
  10. Bake for 55 minutes, turning to broil for the last 2-3 minutes.

Please follow me @aimeesapron on Instagram for more recipe ideas daily! https://www.instagram.com/aimeesapron/

meatballs & spaghetti squash

Have you ever had spaghetti squash? Well, it is just that – a squash and contains several nutrients like, potassium, vitamin A and folic acid. It is also very low in calories so like zoodles (zucchini noodles) it’s a great alternative to regular pasta.

Watch how I made it on my Instagram: https://www.instagram.com/stories/highlights/17978538517303720/

You should know that the outside skin of a spaghetti squash is very tough. Because I was in a hurry this evening, these are the steps I took to prepare it:

Spaghetti Squash
  1. Pierced the skin several times with a fork.
  2. Microwaved on high for 5 minutes.
  3. Cut it in half lengthwise and scooped out the seeds.
  4. Placed back in the microwave for another 5 minutes.
  5. Used a fork to pull the fibers apart which look like spaghetti strands.

spaghetti squash

makes 4-5 servings

  • 1 spaghetti squash, cooked and scraped into strands
  • 1 tablespoon of butter
  • 1 tablespoon of flour
  • 1 cup of milk
  • 1/4 cup to 1/2 a cup of cheese of your choice
  • Salt & pepper to taste
  • Optional: 1 tablespoon of grated Parmesan
  1. In a saucepan over medium heat add the butter and let it melt.
  2. Pour in the flour and stir to combine allowing the flour to cook for 1-2 minutes.
  3. Add the milk, a pinch of salt & pepper stirring or whisking until it becomes thick and bubbly.
  4. Add the cheese and turn off the heat.
  5. Pour half of the cheese mixture into each half of the spaghetti squash.
  6. Mix and coat all the strands with the cheese mixture.
  7. Place on a baking sheet and bake at 375 degrees for 15 – 20 minutes.

meatballs in marinara

makes 4 servings

  • 1 pound of 85/15 ground beef
  • 1 slice of bread
  • 1/4 cup milk
  • 1 tablespoon crushed garlic
  • 1 egg
  • Salt & pepper to taste
  • Chopped parsley to your liking
  1. In a mixing bowl, dump all the ingredients and mix with your hands.
  2. Form mixture into small meatballs and place in an oven safe dish.
  3. Bake at 375 degrees for 15 -20 minutes.
  4. Remove from oven and pour your favorite marinara sauce over, just enough to cover the meatballs.
  5. Place back in the oven for 10 more minutes.
  6. Serve with grated Parmesan on top.

Please follow me @aimeesapron on Instagram for more recipe ideas daily! https://www.instagram.com/aimeesapron/