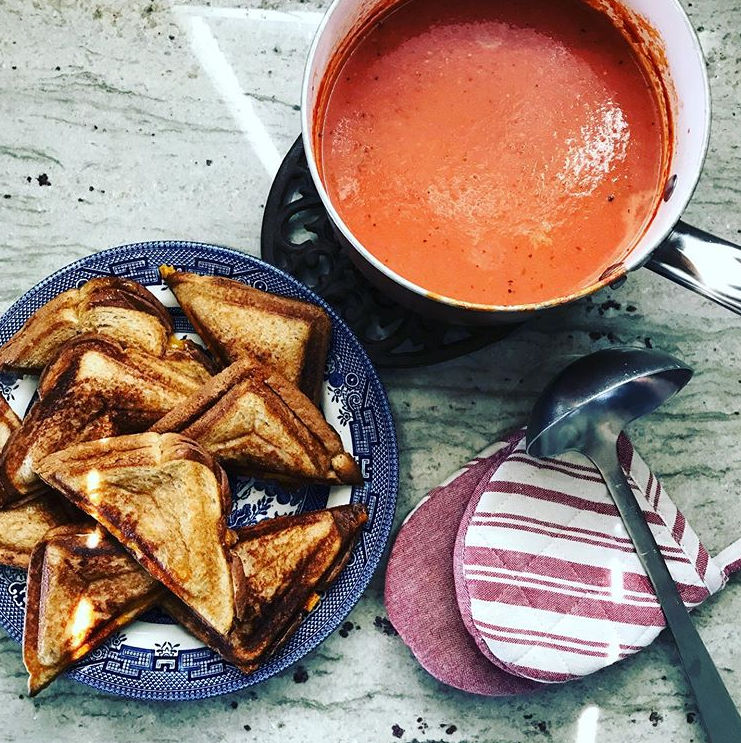
mom’s night out grilled cheese & tomato soup

grilled cheese

makes 4 servings

Even though my husband is full capable of feeding the children if I step out for the evening, I still feel pangs of guilt as if I am leaving them with no food options. My Mom’s Night Out grilled cheese is a quick dinner I can whip up and one my kids and husband love.

Ok so most people do not need a recipe for grilled cheese. I do however, think you can jazz up any normal grilled cheese and here are some ideas:

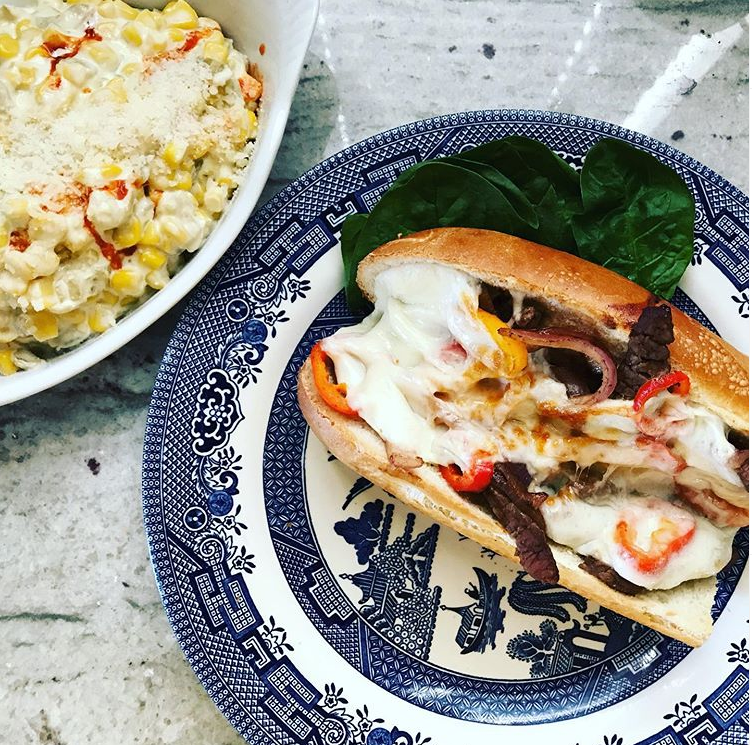
  • Add meats to the inside of the bread along with the cheese
  • Use a panini press or sandwich press to make the grilled cheese extra melty – yes that is a word 🙂
  • Toast your bread before so that the bread is extra crunchy
  • Cut the bread in diagonals to make perfect “dippers” to go with tomato soup

creamy tomato soup

makes 4-6 servings

  • A 28 oz can of crushed tomatoes
  • 2 gloves garlic, crushed
  • 1 tablespoon olive oil
  • 1 tablespoon Italian seasoning
  • 1 teaspoon sugar
  • 1 1/2 cups chicken stock
  • 1/4 cup heavy cream
  • 1 tablespoon Parmesan cheese
  1. In a pot, add 1 tablespoon olive oil over medium heat.
  2. Add the crushed garlic to the pan, and then pour in the crushed tomatoes.
  3. Sprinkle in a teaspoon of sugar. The sugar helps to cut the acidic taste that comes from canned tomato products.
  4. Sprinkle in the Italian seasoning stirring occasionally.
  5. Add in the chicken stock and stir to combine. Let simmer for 2-3 minutes.
  6. Add both the Parmesan cheese and heavy cream and stir to combine.
  7. Finish with more Parmesan to taste and fresh parsley or basil.

Please follow me @aimeesapron on Instagram for more recipe ideas daily! https://www.instagram.com/aimeesapron/

summer grilled chicken and corn

It’s grilling season in Texas and one of my favorites meats to grill is chicken thighs.

Oh how I love chicken thighs. Let me count the ways…

  1. They’re an inexpensive cut of meat.
  2. You can’t mess them up! There’s no over-cooking. They just become more tender.
  3. Being so tender, they are great for grilling over direct heat and still being juicy.
  4. They take on the flavors you put on them so well.

To go with my grilled chicken I just new I had to have some fresh summer corn. Grilled corn on its own with globs of butter is heaven. BUT grilled corn with globs of homemade spicy butter? To die for. Let me tell you how I made it!

grilled chicken thighs

makes 4 servings

  • 4-6 boneless or bone-in, skinless or skin-on chicken (the only factor that changes is the time it takes to cook them)
  • Salt and pepper to taste
  • Your favorite BBQ sauce (I like Sweet Baby Ray’s)
  • 4 fresh corn on the cob
  • 2 tablespoons of your favorite butter, softened (I like Kerrigold)
  • 1/2 teaspoon chili powder
  • 1/2 teaspoon paprika
  • 1/2 teaspoon cumin
  • 1 teaspoon fresh cilantro, chopped finely
  • Queso fresco or feta cheese for sprinkling
  1. Start by preparing your butter. Take 2 tablespoons softened butter and add the chili powder, paprika, cumin and cilantro to it in a small bowl. Stir until combined.
  2. If you are in a hurry you can just leave it in the bowl and pop it in the fridge until you’re ready to eat OR you can wrap it in wax paper and roll it up like a cigar and put it in the fridge for an hour or more. This way it will harden and you can slice of pieces of butter.
  3. Season your chicken with salt and pepper and place on the grill to cook. Be sure to check on the meat and turn as needed.
  4. Place the corn on the cob to grill.
  5. When the chicken is almost done, baste the chicken with your BBQ sauce.
  6. Once the chicken and corn are cooked through, plate with a side of juicy watermelon and a pinch of Mexican sweet chili powder, and dollop the chili butter along with some queso fresco on your corn.
  7. You MUST eat this on your porch or backyard. It’s so good!

Please follow me @aimeesapron on Instagram for more recipe ideas daily! https://www.instagram.com/aimeesapron/

no waste chicken

On my Instagram post @aimeesapron, I called this no waste chicken, but really this is a quick Italian inspired way to use up a combination of left overs and items that were soon to go bad.

Believe it or not sometimes, I don’t feel like cooking. I work full-time for an ad agency and then full-time as wife and mother and on those days I feel like I have to give myself a little pep talk. Sometimes, I challenge myself. What can I make in 30 minutes or less and also use up any items I have on-hand?

That night, I has fresh chicken breasts that were only going to last a few more days or would need to be frozen. I had about a half a cup of really good marinara sauce, but definitely not enough for a whole pasta meal and a handful of dry pasta at the bottom of a box. And presto, no waste chicken was born.

no waste chicken

makes 4 servings

  • 4-6 boneless skinless chicken breasts
  • 1 teaspoon Italian seasoning
  • Salt and pepper to taste
  • 1 garlic clove, crushed
  • 1 tablespoon olive oil
  • A cup of fresh spinach
  • 1/2 cup of marinara sauce
  • 4 slices mozzarella cheese
  • A handful or so of left over dried pasta (uncooked)
  • 1/4 cup frozen peas
  • Parmesan cheese to taste
  1. Bring two cups of water to a boil and lightly salt the water. Add the dry pasta in, stirring occasionally until cooked al dente.
  2. Next, add the frozen peas to the pasta water until they are warmed through. This only takes a few minutes. Why dirty up another pot?
  3. Drain the pasta and the peas and set aside.
  4. Season both sides of the chicken breasts with salt, pepper and Italian seasoning.
  5. Bring a pan to medium-high heat with a tablespoon of olive oil and crushed garlic and add the chicken breasts, browning on both sides. Once cooked, remove the chicken on a plate to rest and set aside.
  6. Add the fresh spinach to the same pan with a pinch of salt to take on the flavor of the chicken bits. Yum!
  7. Once the spinach is wilted, add the chicken back in and place some spinach leaves over each piece of chicken breast.
  8. Next, place a slice of mozzarella cheese over the spinach and chicken.
  9. Toss the pasta and peas into the pan with the chicken to warm through.
  10. Drizzle the marinara sauce over the chicken and pasta and put the lid on the pan for about 2-3 minutes until the marinara sauce it warmed through and the cheese has melted nicely over the chicken.

Please follow me @aimeesapron on Instagram for more recipe ideas daily! https://www.instagram.com/aimeesapron/

about aimee

My name is Aimee. Born and raised in Texas. Married to my podna’ for over a dozen now. Have three beautiful girls two of whom are twins. Have a sweet little dog named Duke and work full-time for an advertising agency.

My girls
My podna’ in crime

Life is chaotic. We have school, work, after-school sports, church, family outings, play-dates with friends to name a few. But one thing we can always count on in my family, is our combined love of food.

Mr. Duke the handsome devil

In our family when we gather, there is always food. No matter how busy we get, we always make time for dinner. Being a self-proclaimed frugal flower child, I try my darnedest to cook at home 5 days a week.

My dream is to have enough land to own chickens one day

Don’t get me wrong, there are nights when I just don’t think I can even look at the stove. But then I remember how much joy it gives me to snap a beautiful picture of a full dinner plate.

So please come by and visit a while. Stay and take a walk through my weeknights and what I cook for my family. I hope you find inspiration!

Please follow me @aimeesapron on Instagram for more recipe ideas daily! https://www.instagram.com/aimeesapron/

creamy rosemary chicken

One thing that grows abundant in this hot Texas climate is rosemary. Did you know that rosemary plants also repel those pesky mosquitoes? You can add rosemary to meat dishes like I have, but you can also infuse olive oils with it, add it to a tequila cocktail or even use it to jazz up a beautifully constructed cheese board.

For now, I’ve made this Monday a little less manic by sitting down to a nice homemade meal of rosemary chicken. I’ll tell ya how I made it.

Rosemary Chicken

makes 4 – 6 servings

  • 4-6 boneless skinless chicken breasts
  • A sprig of fresh rosemary
  • 1/2 cup of heavy cream
  • 1/2 a lemon, juiced
  • 1 teaspoon crushed garlic
  • 1 tablespoon butter
  • Salt & pepper to taste
  1. Chop the rosemary and sprinkle it over the chicken along with salt and pepper.
  2. To a pan over a medium-high flame, add a tablespoon of oil and the crushed garlic. Add the chicken and let brown on both sides.
  3. Once the chicken is cooked through add the lemon and heavy cream and cook until bubbly.
  4. Serve over pasta, rice or in this case quinoa.

Instant Pot owners did you know….you can cook the perfect quinoa in your Instant Pot in 1 minute cooking time? I mean PERFECT. All you do is rinse your dry quinoa to remove any dust or dirt, add it to your Instant Pot with water or broth and set the manual cooking time to 1 minute. It’s that easy!!

Recipe: 1 cup quinoa + 2 cups water or chicken broth = PERFECT 1 minute quinoa

Please follow me @aimeesapron on Instagram for more recipe ideas daily! https://www.instagram.com/aimeesapron/

taco bowls

I used to be able to eat a whole bag of skittles for breakfast, a can of coca-cola, Frito pie with a side of rectangle pizza for lunch and then two servings of dinner back in high school. Did I have a gut or cellulite any where in sight? No. Those were the good old days.

My girls are still younger than high school aged kids but they eat as much as teenagers do, and I definitely let them indulge. Tonight I made taco meat for them in flour tortillas and with loads of cheese. But as a lighter option for my husband and I, I made taco bowls.

Essentially, I replace the tortilla with lettuce and feel good about what I am eating. Here’s how to make it:

Taco Bowls

makes 4 servings

  • 1 pound lean ground beef
  • 1 teaspoon cumin powder
  • 1 teaspoon chili powder
  • 1 teaspoon paprika
  • 1 teaspoon crushed garlic
  • 1 tablespoon chopped fresh cilantro
  • 1 avocado, diced
  • 1 cup white rice cooked (see below for how I make rice)
  • Lettuce of your choice
  • A few grape tomatoes sliced
  • Sour cream for dolloping
  • Queso fresco or feta cheese to taste
  • Slice of lime for squeezing
  • Salt & pepper to taste
  1. Place your ground beef in a pan with no oil. Season with salt & pepper and add the cumin, chili powder, paprika and garlic to the pan.
  2. In the meantime, cook your white rice (see below)
  3. In a serving bowl add a bed of lettuce.
  4. Top with a helping of cooked white rice.
  5. Once your meat is browned and cooked through scoop a generous portion onto the lettuce and rice and top with tomatoes, avocado & cilantro.
  6. I like to add a dollop of sour cream, crumbled queso & a squeeze of lime on top to make it that more special.

How I Cook Rice

Something you will get to know about me, is that when I am cooking for my family, I rarely measure. Even if I am following a recipe, my normal routine is to add a little of this and a little of that.

I watched my mother cook rice and now I do it this same way.

  1. I put a pot on medium heat and add about a tablespoon of my favorite cooking oil.
  2. I add the dry rice in and let it saute in the oil, stirring frequently. You don’t want the rice to burn.
  3. Once I smell the toasted rice and see it has a beautiful golden flavor, I add some water to cover and stir. I do not put the lid on the pot.
  4. Optional: if you wanted to make flavored rice, I add my flavorings here. Maybe a chicken or tomato bouillon cube. For the taco bowls I left the rice plain but added a little salt.
  5. I continue to stir occasionally and add water as needed until rice is cooked al dente.

Please follow me @aimeesapron on Instagram for more recipe ideas daily!https://www.instagram.com/aimeesapron/

cheesesteak & elote

I live in Texas. Born and raised, so don’t come for me Philly! You’ll notice I did not dare call this a Philly cheesesteak, however I was inspired by the original. Mine, however doesn’t require long roasting or all the laboriousness that goes with a juicy, creamy, savory cheesesteak. That process is better left to the pros.

I can however, tell you just how easy and satisfying this cheesesteak was to make.

The Cheesesteak

makes 4 servings

  • A baguette sliced into sandwich portions *
  • 1 pound top round beef
  • 8 slices provolone cheese
  • 6 mini bell peppers or 1 whole one
  • 1 small red onion
  • 1 tablespoon Worcestershire sauce
  • * for my fellow gluten free friends, you can use Udi’s brand french baguettes: https://udisglutenfree.com/products/french-baguettes/
  1. Slice the top round into strips – as thin as you can get them. Season with salt and pepper. Add them to a skillet with a little olive oil to brown.
  2. Once browned, remove and set aside.
  3. Add the sliced peppers and onions to the same skillet and brown.
  4. Once browned, add the meat back in with 1 tablespoon of Worcestershire sauce.
  5. Slice your baguette through the middle but not all the way through so you can pocket your filling.
  6. Add the meat, peppers and onions to the bun and then lay two slices of provolone on top.
  7. Put the entire sandwich open faced on a sheet pan and put it either in your oven with the broiler on for maybe 5 minutes or you can put it in your toaster oven like I did for literally 1 minute.

The Elote

makes 4 servings

  • A can of low sodium corn, drained
  • 1 tablespoon of butter
  • 1 tablespoon of sour cream
  • 1 small can of green chiles
  • 1 heaping tablespoon of mayonnaise
  • Queso fresco or grated Parmesan to taste
  • Cholula hot sauce to taste
  1. Add a tablespoon of butter to a pot over medium heat and the corn.
  2. Also add the whole can of green chiles
  3. Once the corn and chiles have come to a simmer, lower the heat to low and add in the mayo and sour cream and combine.
  4. To serve, add to a dish and sprinkle cheese to taste as well as your favorite hot sauce.

Please follow me @aimeesapron on Instagram for more recipe ideas daily!https://www.instagram.com/aimeesapron/

skillets

Towards the end of the week, usually on Thursdays, I begin looking through my fridge and pantry to pull out those food items that are close to going bad or partial leftovers that wont make for a full meal. I take stock of my options and more often than not, I create a skillet.

Watch me make it on my instagram channel @aimeesapron: https://www.instagram.com/stories/highlights/18050539966184210/

A skillet for me involves meat of some kind, veggies and a starch. Today, based on my options I made a kielbasa skillet with veggies and white rice. I can give the low-down on my version featured above, but remember you can make your own skillet at home using what you have leftover. Just keep this simple equation in mind: cooked meat + lots of fresh veggies + a starch like rice, pasta or potatoes = helluva good skillet dinner!

To make my Thursday night skillet:

Makes 4 servings

  • A package of kielbasa sausage
  • 6 mini bell peppers
  • A bunch of fresh spinach
  • Elote from the night before (see cheesesteak & elote in recipes)
  • 1 cup cooked rice
  • Parmesan cheese to taste
  1. Cut the kielbasa into bite size slices. Add to a nonstick skillet with 1 teaspoon of oil. I use avocado oil.
  2. While the sausage is browning, I cut the bell peppers up into little rings. I add those to the pan to brown.
  3. Once the sausage and bell peppers are browned, I add in the spinach to wilt and the rice to warm through and soak up all the meat juices.
  4. Next, I add in the elote and combine everything.
  5. Lastly, plate the skillet up and sprinkle with Parmesan cheese

Please follow me @aimeesapron on Instagram for more recipe ideas daily!https://www.instagram.com/aimeesapron/

3 minute tuna salad

Even those who turn their noses up at the thought of tuna salad will want to try this version. Here’s what you need:

  • Lettuce – your choice – I used iceberg
  • A cucumber
  • 1 tablespoon olive oil
  • 1 tablespoon vinegar – your choice – I used apple cider
  • A pinch of salt
  • 1 tablespoon mayonnaise
  • 1 pack of tuna packed in water
  • Lemon pepper to taste
  • 1 tablespoon of sunflower seeds

Here’s how you do it:

  1. Take the lettuce and amount of your choice and place that in a bowl
  2. Slice a cucumber in half moons and sprinkle on top of the lettuce
  3. Scoop out a half or whole avocado and dice it up and add to the lettuce and cucumber
  4. In a small prep dish, whisk together a tablespoon of olive oil, a tablespoon of any vinegar of your choice and a pinch of salt. Drizzle that over your lettuce and veggies
  5. In another prep bowl, add your drained tuna – I like mine packed in water – and a heaping tablespoon of mayonnaise and sprinkling of lemon pepper. Combine and then place on to of your salad
  6. Lastly, and this is optional, add a tablespoon or so of sunflower seeds

It takes 3 minutes to throw together once you have your ingredients ready. Don’t believe me? Watch me do it here: https://www.instagram.com/tv/By_fJ5Xh2XO/

Please follow me @aimeesapron on Instagram for more recipe ideas daily!https://www.instagram.com/aimeesapron/

our developing tastes

At what point in our lives do we cultivate true favoritism’s in the foods we eat? I can remember around the six-month mark with each of my children, we would sit them down, drape them with a bib and start the video camera, ready to record their first taste of solid foods.

Inevitably, what we assumed they might enjoy – pureed green beans mixed with applesauce – actually quite shocked their young systems. They would make faces of puzzled disgust and lock eyes with us almost telepathically shouting, “why would you feed this to me!?” And it would never surprise us that the pureed sweet potatoes would be a hit.

So at what point do we decide what tastes good to us? An article by Amy Fleming in 2014 stated, “Some 15 to 16 weeks after conception, foetuses will show their sugar appreciation by swallowing more amniotic fluid when it’s sweet, and less when bitter.” So our mothers begin the process of building our tastes, further aiding us by preparing or purchasing our meals. This is to say that to all the parents out there, the saying, you are what you eat, can be quite a daunting realization.

Knowing what I know now, I have definitely taken on a more important role as the chief chef in our home. I want to ensure that I give our girls variety, healthful options and of course strict encouragement. Picky eaters – every home has one – cannot be catered to. You chief home chefs are not short-order cooks and you should not have to cook Jane one meal and Dick another. I encourage all my fellow home chefs to get out of your comfort zone and try new ingredients. Invite your kids to watch or even cook along. After all, we are creating a new generation of foodies. It is our duty to feed them right!

Please follow me @aimeesapron on Instagram for more recipe ideas daily!https://www.instagram.com/aimeesapron/